This page is a short overview how to program an ATtiny85. Many sites and instructions can be found on the internet and this page contains the ones I used for my usage.
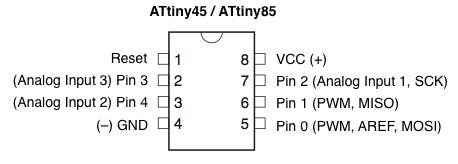
The ATtiny85 is is a 8-pin, 1MHz - 20 MHz processor that can be used in projects where not all the pins of a ATmega328 are used.
Because the processor can run at 1.7V with a clock frequency of 1MHz on an internal crystal and when used in combination with the sleep functions power usage can be very low. See Nick Gammon site: https://www.gammon.com.au/forum/?id=11497
Not all libraries are happy with clock speeds other than 16MHz. See my DCF77-ATtiny85 project here
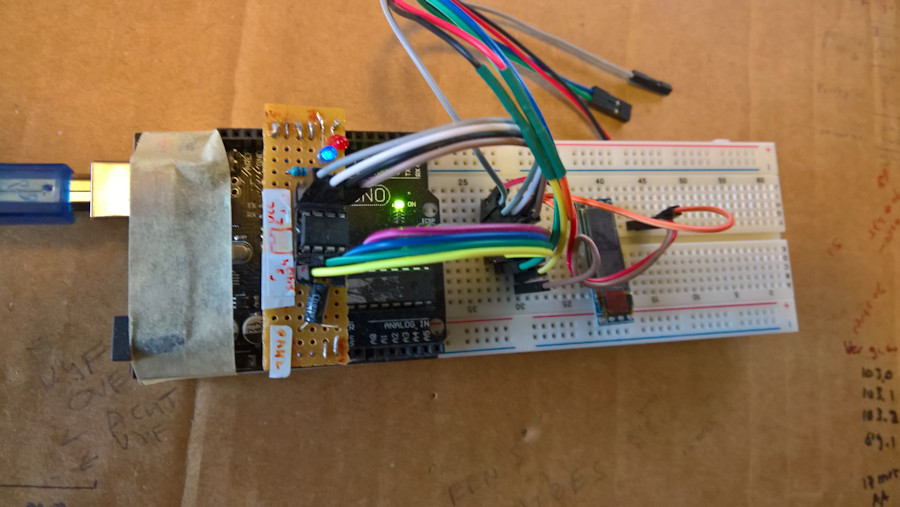
How to install and program the ATtiny85 can be found here: https://create.arduino.cc/projecthub/arjun/programming-attiny85-with-arduino-uno-afb829
In short:
• Open the preferences dialog in the Arduino software.
• Find the “Additional Boards Manager URLs” field near the bottom of the dialog.
Paste the following URL into the field (use a comma to separate it from any URLs you’ve already added):
https://raw.githubusercontent.com/damellis/attiny/ide-1.6.x-boards-manager/package_damellis_attiny_index.json
• Click the OK button to save your updated preferences.
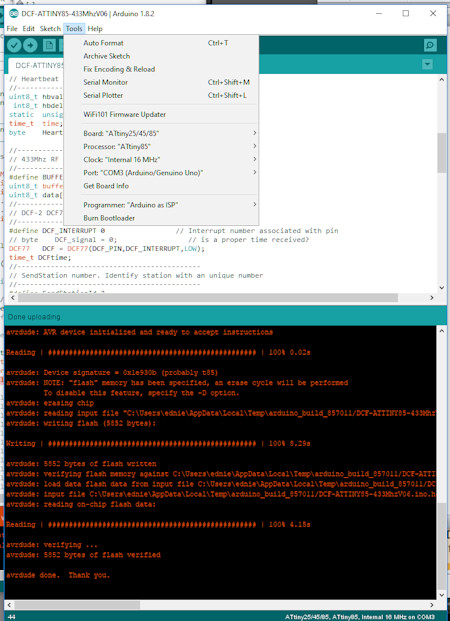
• Open the boards manager in the “Tools > Board” menu.
• Click on the ATTiny entry. An install button should appear. Click the install button.
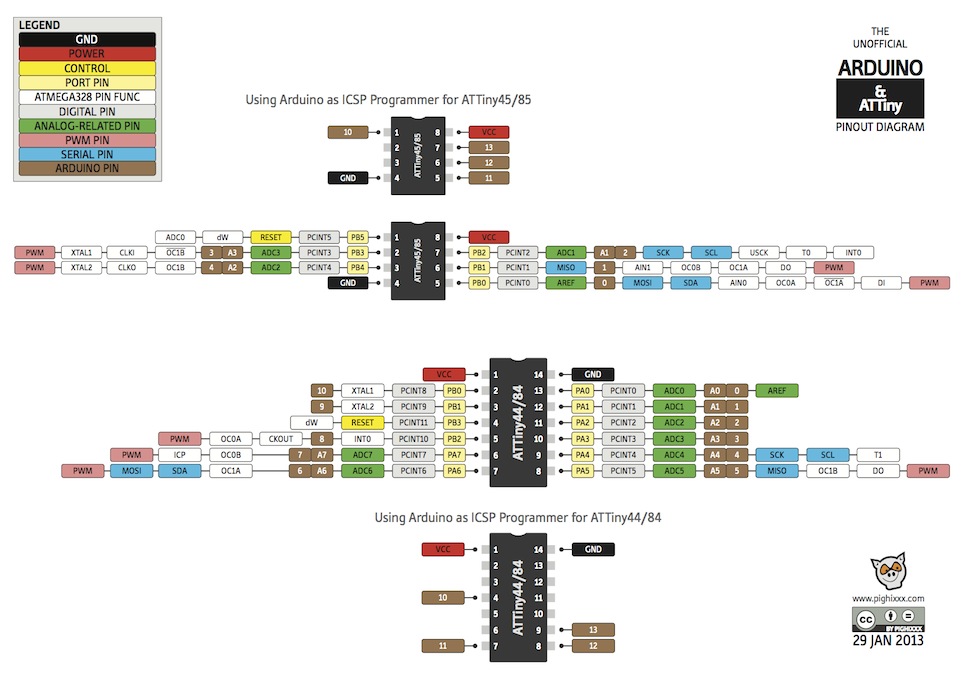
The extensive colorful pin lay-out of the ATtiny85 is from this site: www.pighixxx.com